
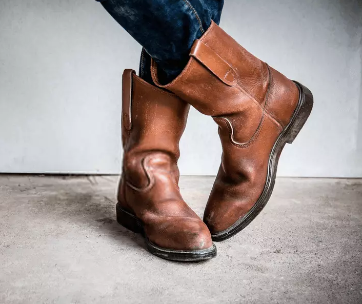
Looking to revive that old pair of boots that you once had a great friendship with but no longer do? Or did your new pair just start showing signs of wear after a couple of outings?
Contrary to what most people may believe, proper boot care doesn’t end after you’ve cleaned them. The thing about boots is that if they are properly taken care of, they can outlast dozens of sneakers and most other types of shoes you own.
And guess what? Ensuring that your cowboy boots are properly and consistently moisturized is a very necessary step to extending their shelf-life.
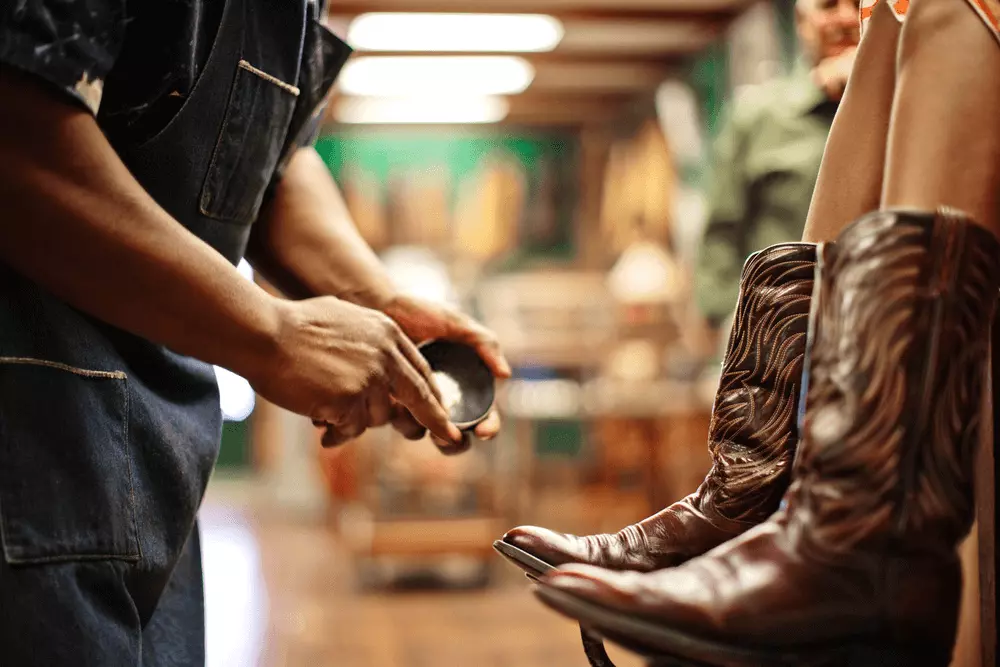
With that in mind, these are the necessary steps on how to shine your cowboy boots. A single boot care routine that probably outweighs all the others.
Step 1: Condition Your Boots
Leather is made of thousands upon thousands of teeny tiny fibers, all of which form a web layer that allows the material to flex. This is the factor that allows you to move your feet without breaking the boot material.
However, with time the fibers are prone to drying out and lose suppleness. This then results in the boot cracking at the flex points.
With that in mind, the first tell-tale sign that a boot is in need of a conditioner is when the leather starts to discolor or have cracks and creases.
A leather conditioner is made to sink into the leather and instil moisture into the fibers thereby restoring their suppleness.
The purpose of a conditioner is thus to add extra strength and stability to the boots.
1. Clean off dust
Clean shoes attract dust so needless to stay, before you go into any shining, ensure that you have dislodged the accumulated dust first.
The process of conditioning comes immediately after cleaning the boot and not before because you need the conditioner to actually penetrate the pores of the leather to keep them soft and pliable. Dirt would otherwise get in the way.
2. Spot test the conditioner
The first thing that you want to do when it comes to applying a conditioner is to conduct a spot-test first before applying it onto the entire boot’s surface.
The last thing you want is to ruin the whole shoe by applying a damaging conditioner. To know whether or not the conditioner is suitable for your boot, leave it to take effect after a couple of hours.
While testing, take note that a slightly darker shade of the leather (to the extent that it doesn’t differ much from the boot’s original color) implies that the conditioner is appropriate for the boot while any discoloration or if the patch turns a lot darker then the conditioner is inappropriate and you should avoid it altogether.
Be sure to spot-test on a very subtle part of the boot so as to avoid major damage in case the conditioner is not suitable for your boot. Of course, having a conversation with the shoe sales person beforehand will give you some insight into the do’s and don’ts of the shoe so check into that.
Be sure to also use a leather specific conditioner to prevent the boots from fading over time. Once you feel confident that the conditioner won’t damage your boot, you can proceed to apply it onto the whole boot.
3. Apply the conditioner onto the boot’s whole surface
When applying a conditioner, the goal is to lock the oils in and prevent the interior fibers from drying out. Thus, a good conditioner is one that is oil-based and not water-based as water actually draws moisture away from the boot leaving it to dry and crack.
The right conditioner is therefore one like oil and that has water-resistant qualities to it. They are especially good for dark cowboy boots as they further darken the boot.
But don’t worry about which conditioners to use, as most brands (especially high-end ones) will guide their customers on which kinds of conditioners are appropriate.
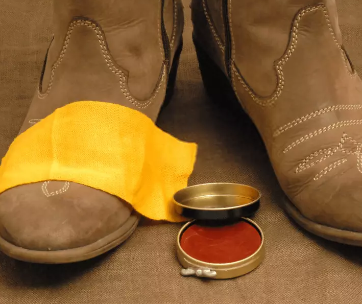
Apply a small amount (quarter-sized) of the leather conditioner onto a soft rag or terry cloth and massage it into the boot. The boot will soak up the conditioner so the drier and more neglected it is, the more conditioner you will have to dispense.
Ensure that you are rubbing in or actually massaging the conditioner as opposed to merely spreading it into the boot’s surface. But at the same time, don’t push the cloth too hard into the boot as you work back and forth.
Once the conditioner stops being soaked into the leather but instead leaves a damp surface, then you should stop.
Please take note that there are different types of leather and each will need a specific type of conditioner. Specifically, look out for the following leather types:
Distressed Leather
One unique characteristic of this leather is that it is water-resistant and perspiration-resistant and can therefore be worn in all weathers. Just be sure to let them dry after every wear in wet conditions.
Also known as oil-tanned or oil-impregnated leather, distressed leather differs from the rest in that it is tanned using oils in order to protect and lubricate the fibers.
With time, the oils begin to disperse. As such, you will need to apply several coats of conditioner or even mink oil to rejuvenate the leathers.
To condition them, just apply the conditioner onto a cloth and spread it evenly into the leather. Be sure to cover all parts of the exterior including the seams and stitches.
Keep them away from artificial heat sources.
Exotic Leathers
Other than cowhide leather, other exotic animal skins have been popularly used to make cowboy boots. This is especially so in the recent fashion era where you will find cowboy boots made of ostrich skin, snake skin, alligator skin or lizard skin.
They are more expensive than most due to the rarity of their material. However, the intricate folds of these materials also make the cleaning and conditioning process more precise.
Be sure to brush off dirt or dust with a damp cloth or soft brush before applying a conditioner.
For starters, these materials have deeper texture which means that their ability to absorb the conditioner isn’t as fast as that of traditional leather.
Another thing that you need to take note of is that because dust and other debris are prone to settling in the folds of these materials and damaging them, the process is more time consuming but entirely worth it once done.
While conditioning, use several thin layers of exotic leather conditioner and be sure to rub with rubber than against the grains of the leather, especially for snake skin.
Lastly, apply a neutral or matching cream based polish and buff with a soft cloth.
4. Wipe off and allow the boots to sit for 24 hours
To ensure that the conditioner is fully soaked in, leave the boots to sit for 24 hours after which you should use a dry cloth to absorb the excess oils and moisture.
Be sure to condition your boots every six months, especially if you reside in dry desert climate, in order to restore that suppleness.
Step 2: Polish the Boots
Polish is a waxy substance that enhances a smoother feel of the boot’s surface by moisturizing the surface. Primarily, polish adds shine to your boot. Cream polishes are the best.
Note that not all leathers will require polishing. Only those with a finish can be polished. Reason being that polishing serves to revive the natural finish of the boot.
The polish adds a layer of protection to the boot’s surface by locking the conditioner in; especially important for smooth-surfaced boots. You might however want to skip this step with highly embroidered boots as they do not take polish well
This process will extend the time you need between each application of the conditioner as the polish will have to wear off first.
Additionally, the polish covers all those scuffs and scratches that age a boot. Therefore, if you are looking to rejuvenate old tired boots then this is a step that you surely do not want to miss. It will leave them looking as young as ever or as close to that as the shoes can get.
1. Rub off any dirt particles
As usual, start with a quick rub-down of the boots surface in order to get rid of any dirt particles on the boot’s surface. You definitely do not want to rub those into the leather while applying the polish.
2. Apply a matching leather polish
For smooth leather boots, you will need to apply a matching leather polish. That is, either a neutral color or one that directly matches the color of your boots.
Apply a light layer of the polish to a clean cloth and rub into your boots while buffing between each layer for the boots to add shine and also to remedy scuff marks.
The advantage of colored polish is that it restores the color of boots especially if they have faded over time.
With old boots, since you want them to look ‘alive’ again, continue to do so until you achieve the desired effect/finish.
There are however a few precautions that you should take when it comes to polish;
For starters, suede boots are exempted from use of polish. As we’ve mentioned before, there are more suitable products that will not damage this material.
Secondly, if your cowboy boots are made of snakeskin, you want to avoid colored polish and while you are at it, ensure that you wipe along rather than against the grain of scales in order to avoid damaging the boot.
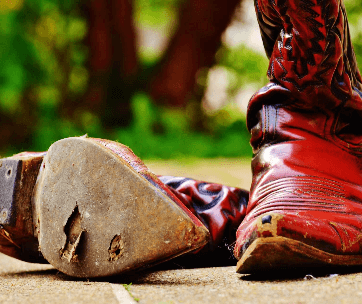
3. Apply edge dressing onto boot soles
Trust us when we say, edge dressing can make the difference between a well-maintained boot and a greatly-maintained boot!
This product will have your outsoles and heels looking good as new
If the soles of your cowboy boots happen to be discolored then use sole edge & heel dressing to restore the original look. This will in turn make your work stand out.
The brush that comes with the edge dressing should be used to stain the sole with quick and even strokes of the edge dressing.
4. Clean off the polish and leave boots to dry
As with the conditioner, be sure to allow the polish to sink into the boot and wipe off excess polish, leaving the boots dry.
After a couple of hours the boots should look rejuvenated and are thus ready to re-wear.
How to Restore the Shine in Suede/Rough out Leather
Caring for suede cowboy boots is usually different than most.
The leather requires no oil, conditioner or even polish. In their place, suede boots require a spray protectant to act as a protective barrier between the leather and dirt or moisture,
You can easily find this leather protector at shoe repair shops
Step One
Start off by brushing over the suede with a toothbrush remove any accumulated dust and dirt
To restore the nap of the boots, use a soft-bristled toothbrush to gently run over any spots where the suede appears to be flat
The strokes will lift the nap up and restore the look and feel of your suede boots
Alternatively, for old suede boots, you can hold the boots over boiling wtare so that the steam can enable the suede material to be brushed back into shape
Step Two
Use a light coat of the leather protectant. And repeat if necessary.
This will lock in the
As with other leathers, spot-test on a small subtle part f the boots and allow the spray to sit for a few minutes.
The manufacturer will guide you on how often and even how to apply the protectant
Within five minutes you should be able to notice any discoloration if the product is inappropriate for your boots so if it discolors your boot then you should opt for another protectant
Wrapping It Up
Proper boot care goes beyond the cleaning stage so you shouldn’t leave it at that.
So from one cowboy boot lover to another; whatever you do, always remember; clean first, condition next, polish last. And be sure to also protect your boots with a non-silicone water and stain protector.
This method has been tried and excelled with several boots over the years so you can do it confidently without worrying about ruining the boots. Quite frankly, the process might take a day or more but this will hold up for a couple more months before the next conditioning so it pays off in the end.
Do this and your boots will surely withstand the test of time.

Comments
This article is very informative and describes each step very well. I do have one question though. My boots have all ready been polished several times. Do I put on the conditioner now on top of the polish or wait until the polished boot, needs polishing again.
Hey John, thank you for your feedback. While it won't hurt to apply the conditioner on top of the polish, you'd be better off applying the conditioner before polishing the boots if you want to achieve maximum benefit. Remember that the conditioner needs to be imbibed by the leather and the polish might be a hindrance to this happening effectively.